如何在 Ubuntu 22.04 / 20.04 / 18.04 中启动进入救援模式或紧急模式
这篇教程将介绍如何在 Ubuntu 22.04、20.04 和 18.04 LTS 版本中引导到 救援Rescue 模式或 紧急Emergency 模式。
你可能已经知道,在 RHEL 7 、RHEL 8 、Ubuntu 16.04 LTS 及其更新的版本的 Linux 发行版中 运行等级Runlevels 已经被 系统目标Systemd target 所替代。更多关于 运行等级Runlevel 和 系统目标Systemd targets 的信息,参考 这篇指南。
这篇指南是针对 Ubuntu 编写的,但是,下面所给的步骤应该也适用于大多数使用 systemd 作为默认服务管理器的 Linux 发行版。
在进入主题前,让我们简单的理解:什么是 救援rescue 模式 和 紧急Emergency 模式,以及这两种模式的目的是什么。
什么是救援模式?
在 Linux 发行版中,救援模式等效于使用 SysV 作为默认的服务器管理器的 单用户single user 模式。在救援模式中,将挂载所有的本地文件系统,将仅启动一些重要的服务。但是,不会启动一般的服务(例如,网络服务)。
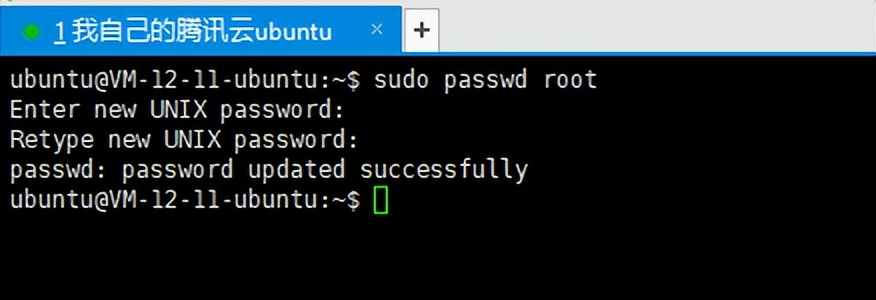
救援模式在不能正常引导系统的情况下是很有用的。此外,我们可以在救援模式下执行一些重要的救援操作,例如,重新设置 root 密码。
什么是紧急模式?
与救援模式相比,在紧急模式中,不会启动任何的东西。不会启动服务、不会挂载挂载点、不会建立套接字、什么都不会启动。你将所拥有的只是一个 原始的 shell。紧急模式适用于调试目的。
首先,我们将看到如何在 Ubuntu 22.04 和 20.04 LTS 发行版中引导到救援模式或紧急模式。在 Ubuntu 22.04 和 20.04 LTS 中的过程是完全相同的!
在 Ubuntu 22.04 / 20.04 LTS 中引导到救援模式
我们可以使用两种方法来引导到救援模式。
方法 1
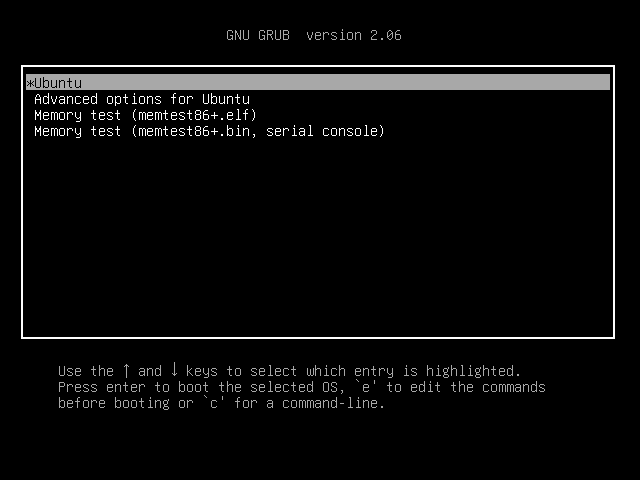
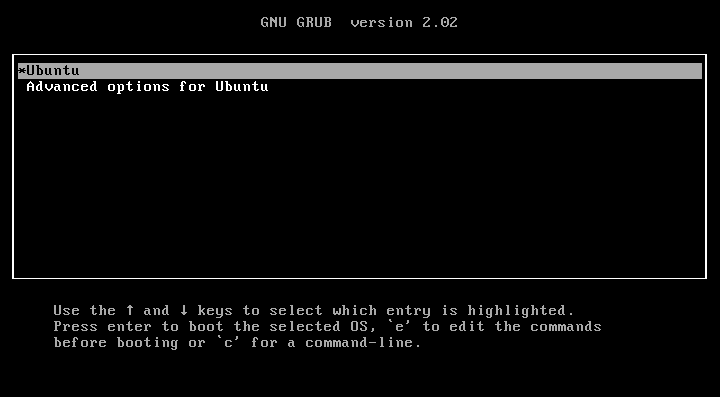
打开你的 Ubuntu 系统。在 BIOS 徽标出现后,按下 ESC按键来显示 GRUB 菜单。
在 GRUB 菜单中,选择第一项,并按下 e按键来编辑它。
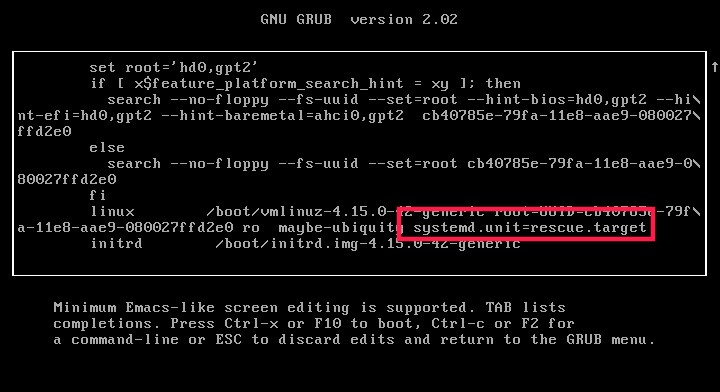
按下 ↓按键,并找到以单词linux开头的一行代码,并在其结尾处添加下面的一行代码。为到达其结尾处,只需要按下Ctrl + e组合键,或使用你键盘上的END按键或←/→按键。
systemd.unit=rescue.target
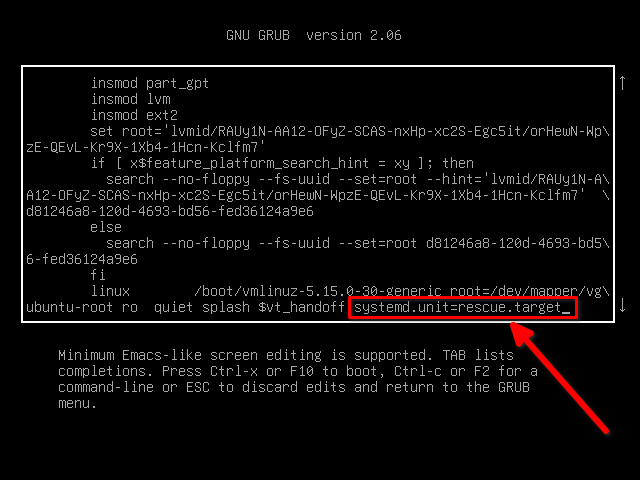
在添加上面的代码行后,按下 Ctrl + x组合键或按下F10按键来引导到救援模式。
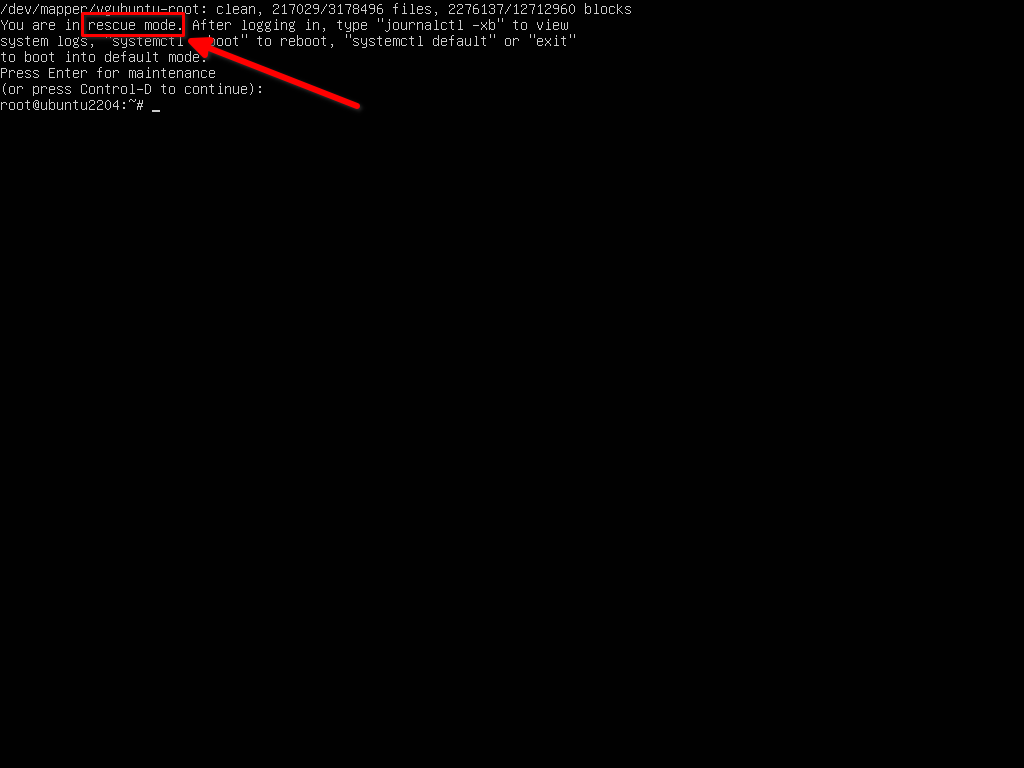
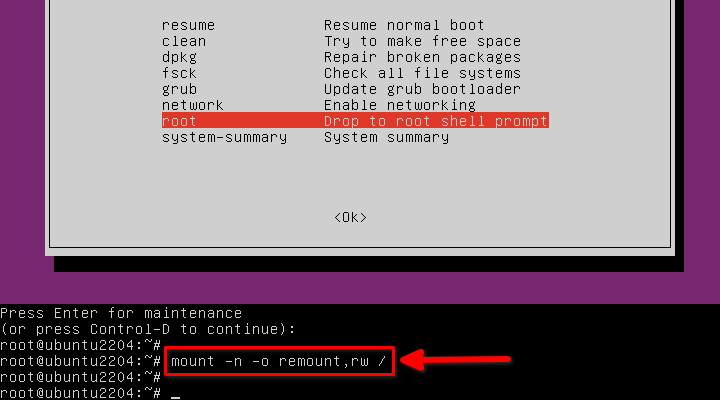
数秒后,你将作为 root 用户来登录到救援模式(即单用户模式)。将会提示你按下回车键来进入维护。
下图是 Ubuntu 22.04 / 20.04 LTS 系统的救援模式的样子:
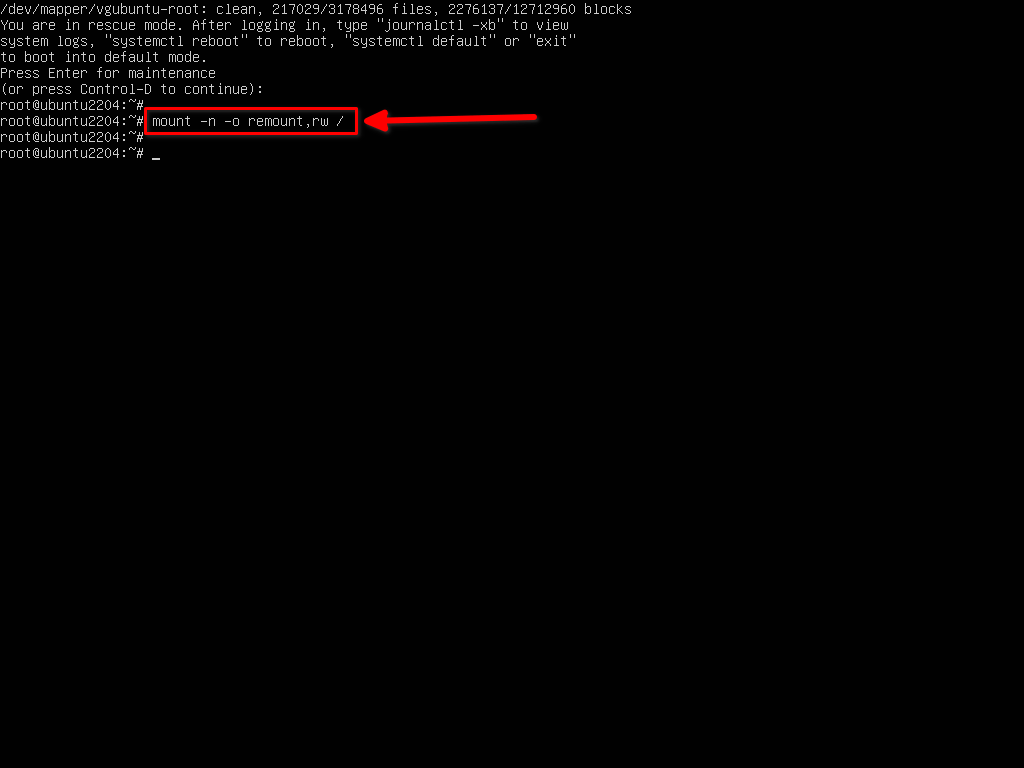
现在,在救援模式中做你想做的任何事。在救援模式中,在你执行任何操作前,你可能需要以 读/写模式来挂载根(/)文件系统。
mount -n -o remount,rw /
在完成后,按下 Ctrl + d组合键来引导到正常模式。或者,你可以输入下面的任意一个命令来引导到正常模式。
systemctl default
或者,
exit
如果你想重新启动系统,而不是引导到正常的模式,输入:
systemctl reboot
方法 2
在这种方法中,你不需要编辑 GRUB 启动菜单项目。
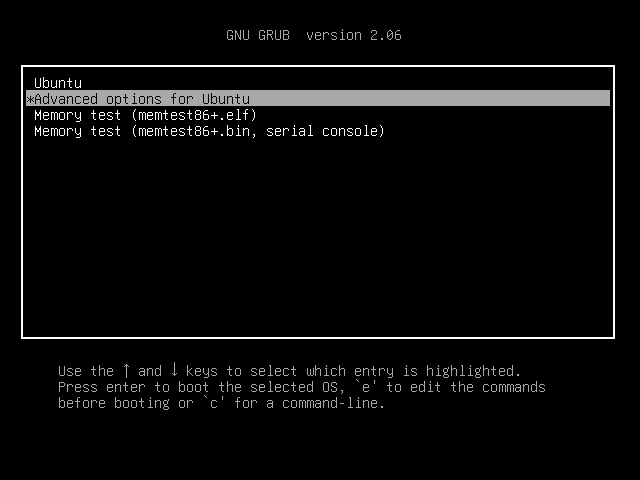
打开系统电源,并从 GRUB 启动菜单中选择 Ubuntu 高级选项Advanced options for Ubuntu。
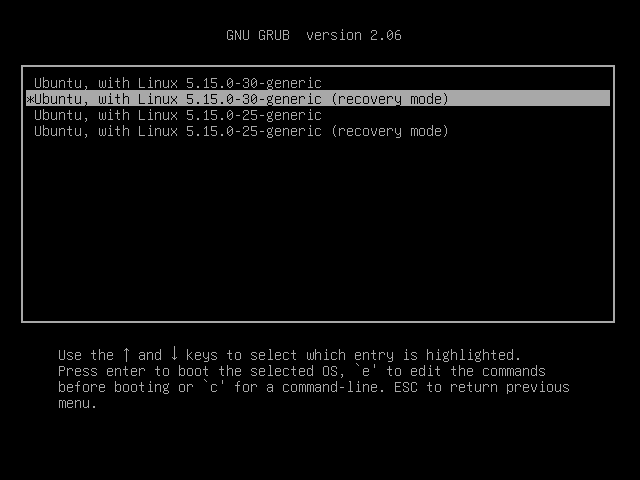
接下来,你将看到一个带有内核版本的可用的 Ubuntu 版本的列表。在 Ubuntu 中的 GRUB 启动菜单中选择 恢复模式Recovery mode 。
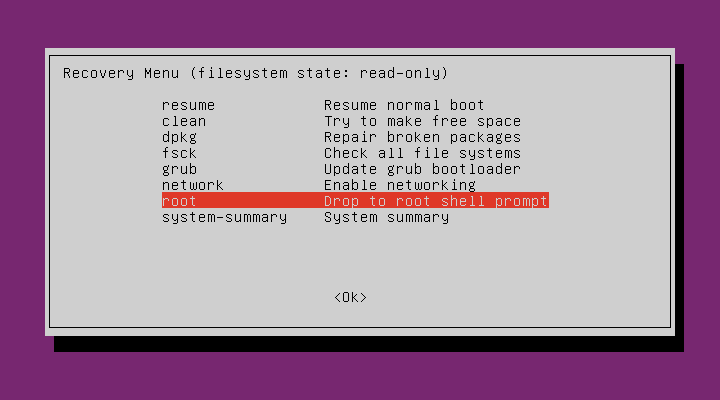
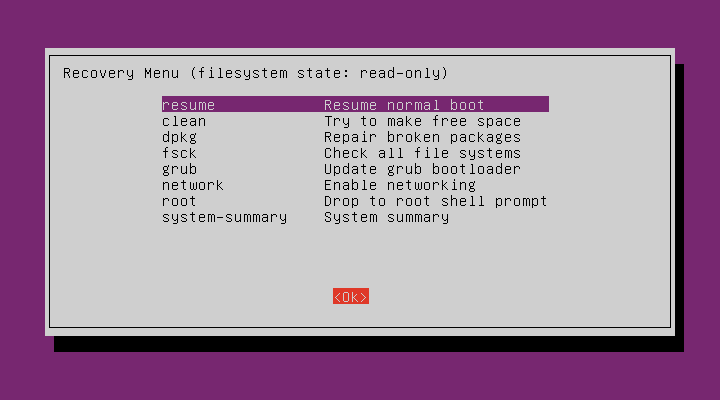
数秒后,你将看到 Ubuntu 的 恢复Recovery 菜单。从恢复菜单中,选择 进入 root 的 shell 提示符Drop to root shell prompt 选项 ,并按下回车键。
现在,你将进入维护。
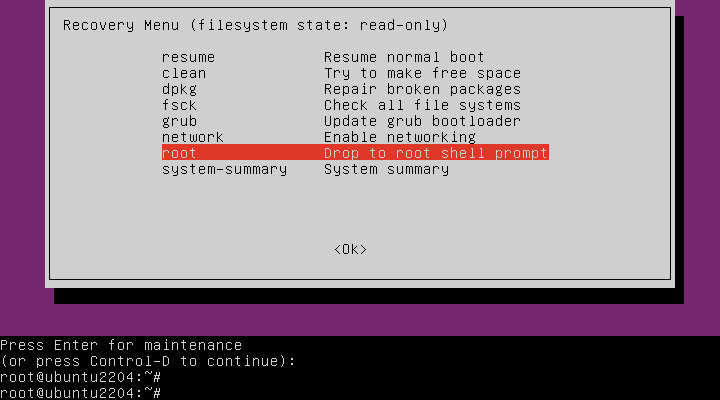
通过输入下面的命令来 以读/写模式的方式 来挂载根(/)文件系统:
mount -n -o remount,rw /
在救援模式中做你想做的任何事。
在完成后,输入 exit来返回到恢复菜单。
exit
最后,选择 救援正常启动Resume normal boot 选项,并按下回车键。
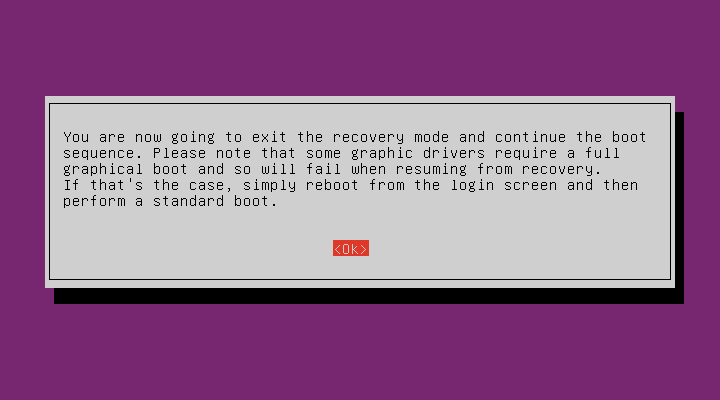
再次按下回车键来退出恢复模式,并继续引导到正常模式。
如果你不想引导到正常模式,从救援模式中输入 reboot并按下回车键来重新启动你的系统。
在 Ubuntu 22.04 / 20.04 LTS 中引导到紧急模式
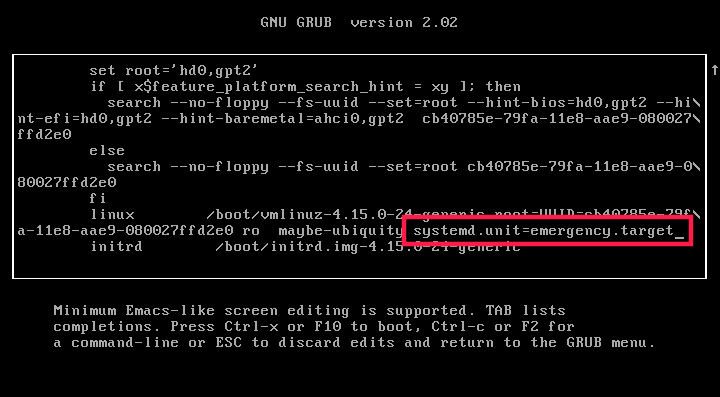
当 GRUB 菜单出现时,按下 e按键来编辑它。
找到以单词 linux开头的一行代码,并在其结尾处添加下面的一行代码:
systemd.unit=emergency.target
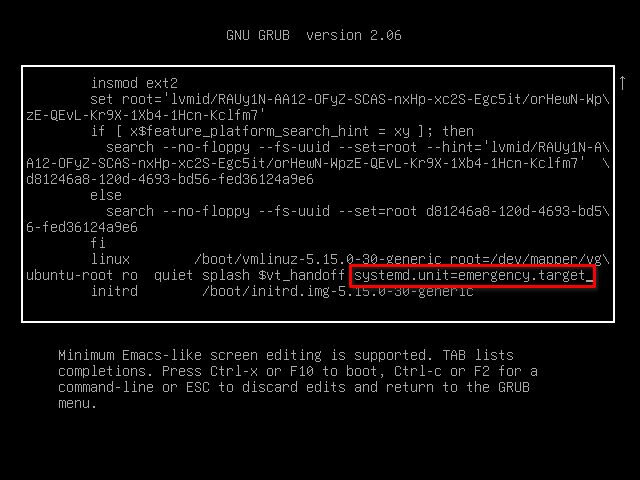
在添加上面的代码行后,按下 Ctrl + x组合键,或按下F10按键来引导到紧急模式。
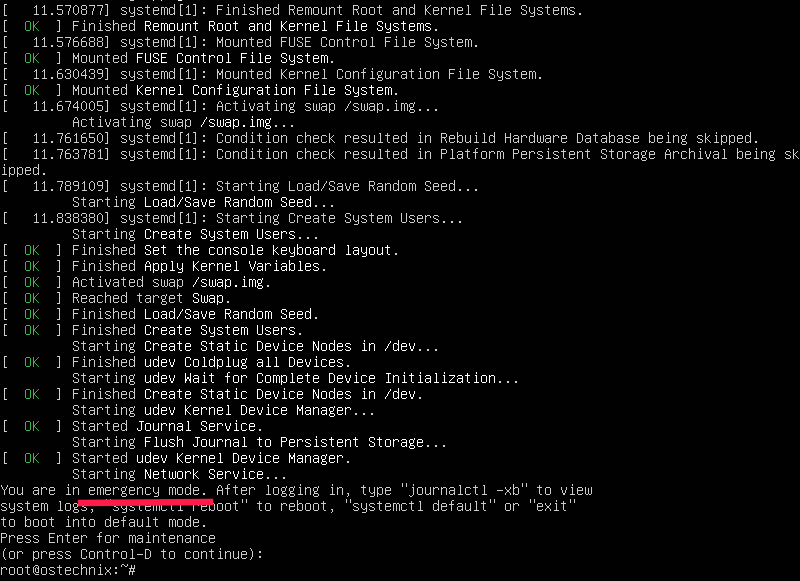
数秒后,你将作为 root用户来进入维护。将会提示你按下回车键来进入紧急模式。
下图是 Ubuntu 22.04 / 20.04 LTS 系统的紧急模式的样子:
现在,在紧急模式中做你想做的任何事。在紧急模式中,在你执行任何操作前,你可能需要以读/写模式来挂载根(/)文件系统。
mount -n -o remount,rw /
在完成后,按下 Ctrl + d组合键来引导到正常模式。或者,你可以输入下面的任意一个命令来引导到正常模式。
systemctl default
或者,
exit
如果你想重新启动系统,而不是引导到正常模式,输入:
systemctl reboot
在 Ubuntu 18.04 LTS 中引导到救援模式
启动你的 Ubuntu 系统。当 GRUB 菜单出现时,选择第一项并按下按键 e来编辑。(为到达其行尾处,只需要按下Ctrl + e组合键,或使用你键盘上的END按键或←/→按键):
如果你没有看到 GRUB 菜单,只需要在 BIOS 徽标出现后,按下 ESC按键来显示 GRUB 菜单。
找到以单词 linux开头的一行代码,并在其结尾处添加下面的一行代码(为到达其行尾处,只需要按下Ctrl + e组合键,或使用你键盘上的 END按键或←/→` 按键):
systemd.unit=rescue.target
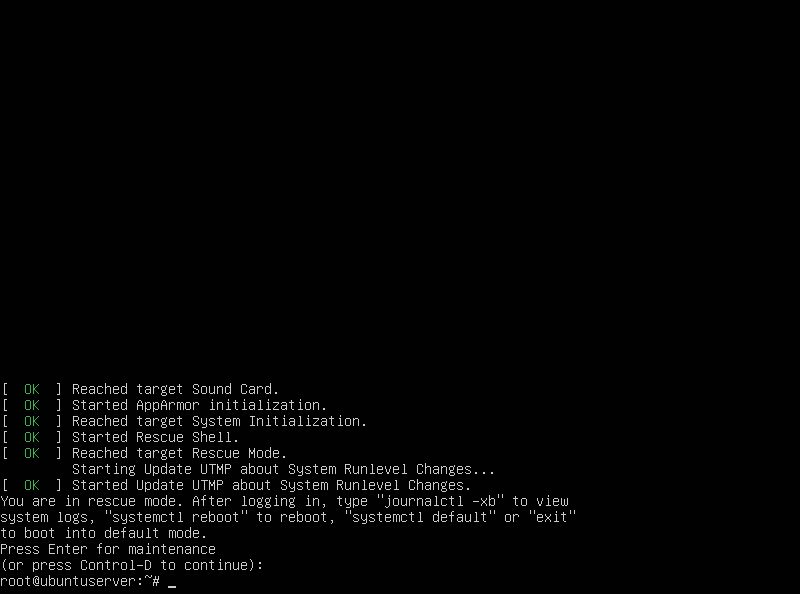
在添加上面的代码行后,只需要按下 Ctrl + x组合键,或按下F10按键来引导到救援模式。数秒后,你将作为root用户进入维护(即单用户模式)。
下图是 Ubuntu 18.04 LTS 服务器系统的救援模式的样子:
接下来,输入下面的命令来挂载根(/)文件系统为读/写模式。
mount -n -o remount,rw /
在 Ubuntu 18.04 LTS 中引导到紧急模式
引导你的 Ubuntu 到紧急模式基本与上述方法相同。你所需要做的全部工作是,在编辑 GRUB 菜单时,将 systemd.unit=rescue.target替换为systemd.unit=emergency.target。
在你添加 systemd.unit=emergency.target后,按下Ctrl + x组合键,或按下F10按键来引导到紧急模式。
最后,你可以使用下面的命令来以读/写模式的方式来挂载根(/)文件系统:
mount -n -o remount,rw /
在救援模式和紧急模式之间切换
如果你正在救援模式中,你不必像我上述提到的那样来编辑 GRUB 的菜单启动项。相反,你只想要输入下面的命令来立刻切换到紧急模式:
systemctl emergency
同样,为从紧急模式切换到救援模式,输入:
systemctl rescue
总结
现在,你知道了什么是救援模式和紧急模式,以及如何在 Ubuntu 22.04 、20.04 和 18.04 LTS 系统中启动到这些模式。正如我已经提到的,在这里提供的这些步骤应该也适用于大多数当前使用 systemd 作为默认服务管理器的 Linux 发行版。

 微信收款码
微信收款码 支付宝收款码